Getting Started (standard GUI)
 SkyGuide provides context-sensitive help. A useful help can be obtained from any points of the user interface. Context-sensitive help, as opposed to online help or online manuals, does not need to be accessible for reading as a whole. Each topic is supposed to describe extensively one state, situation, or feature of the software.
SkyGude features two graphic user interfaces (GUI).
The standard GUI, which starts by default, provides all the basic functionalities. It is designed around a head up display (HUD) showing the current image for guiding, a target and key information.
The advanced GUI provides more detailed information and access to advanced features and settings.
One can switch from one to the other live,a t any time, using the two tabs located at the upper left side of any GUI.
It may take one guider frame before the GUI is fully refreshed.
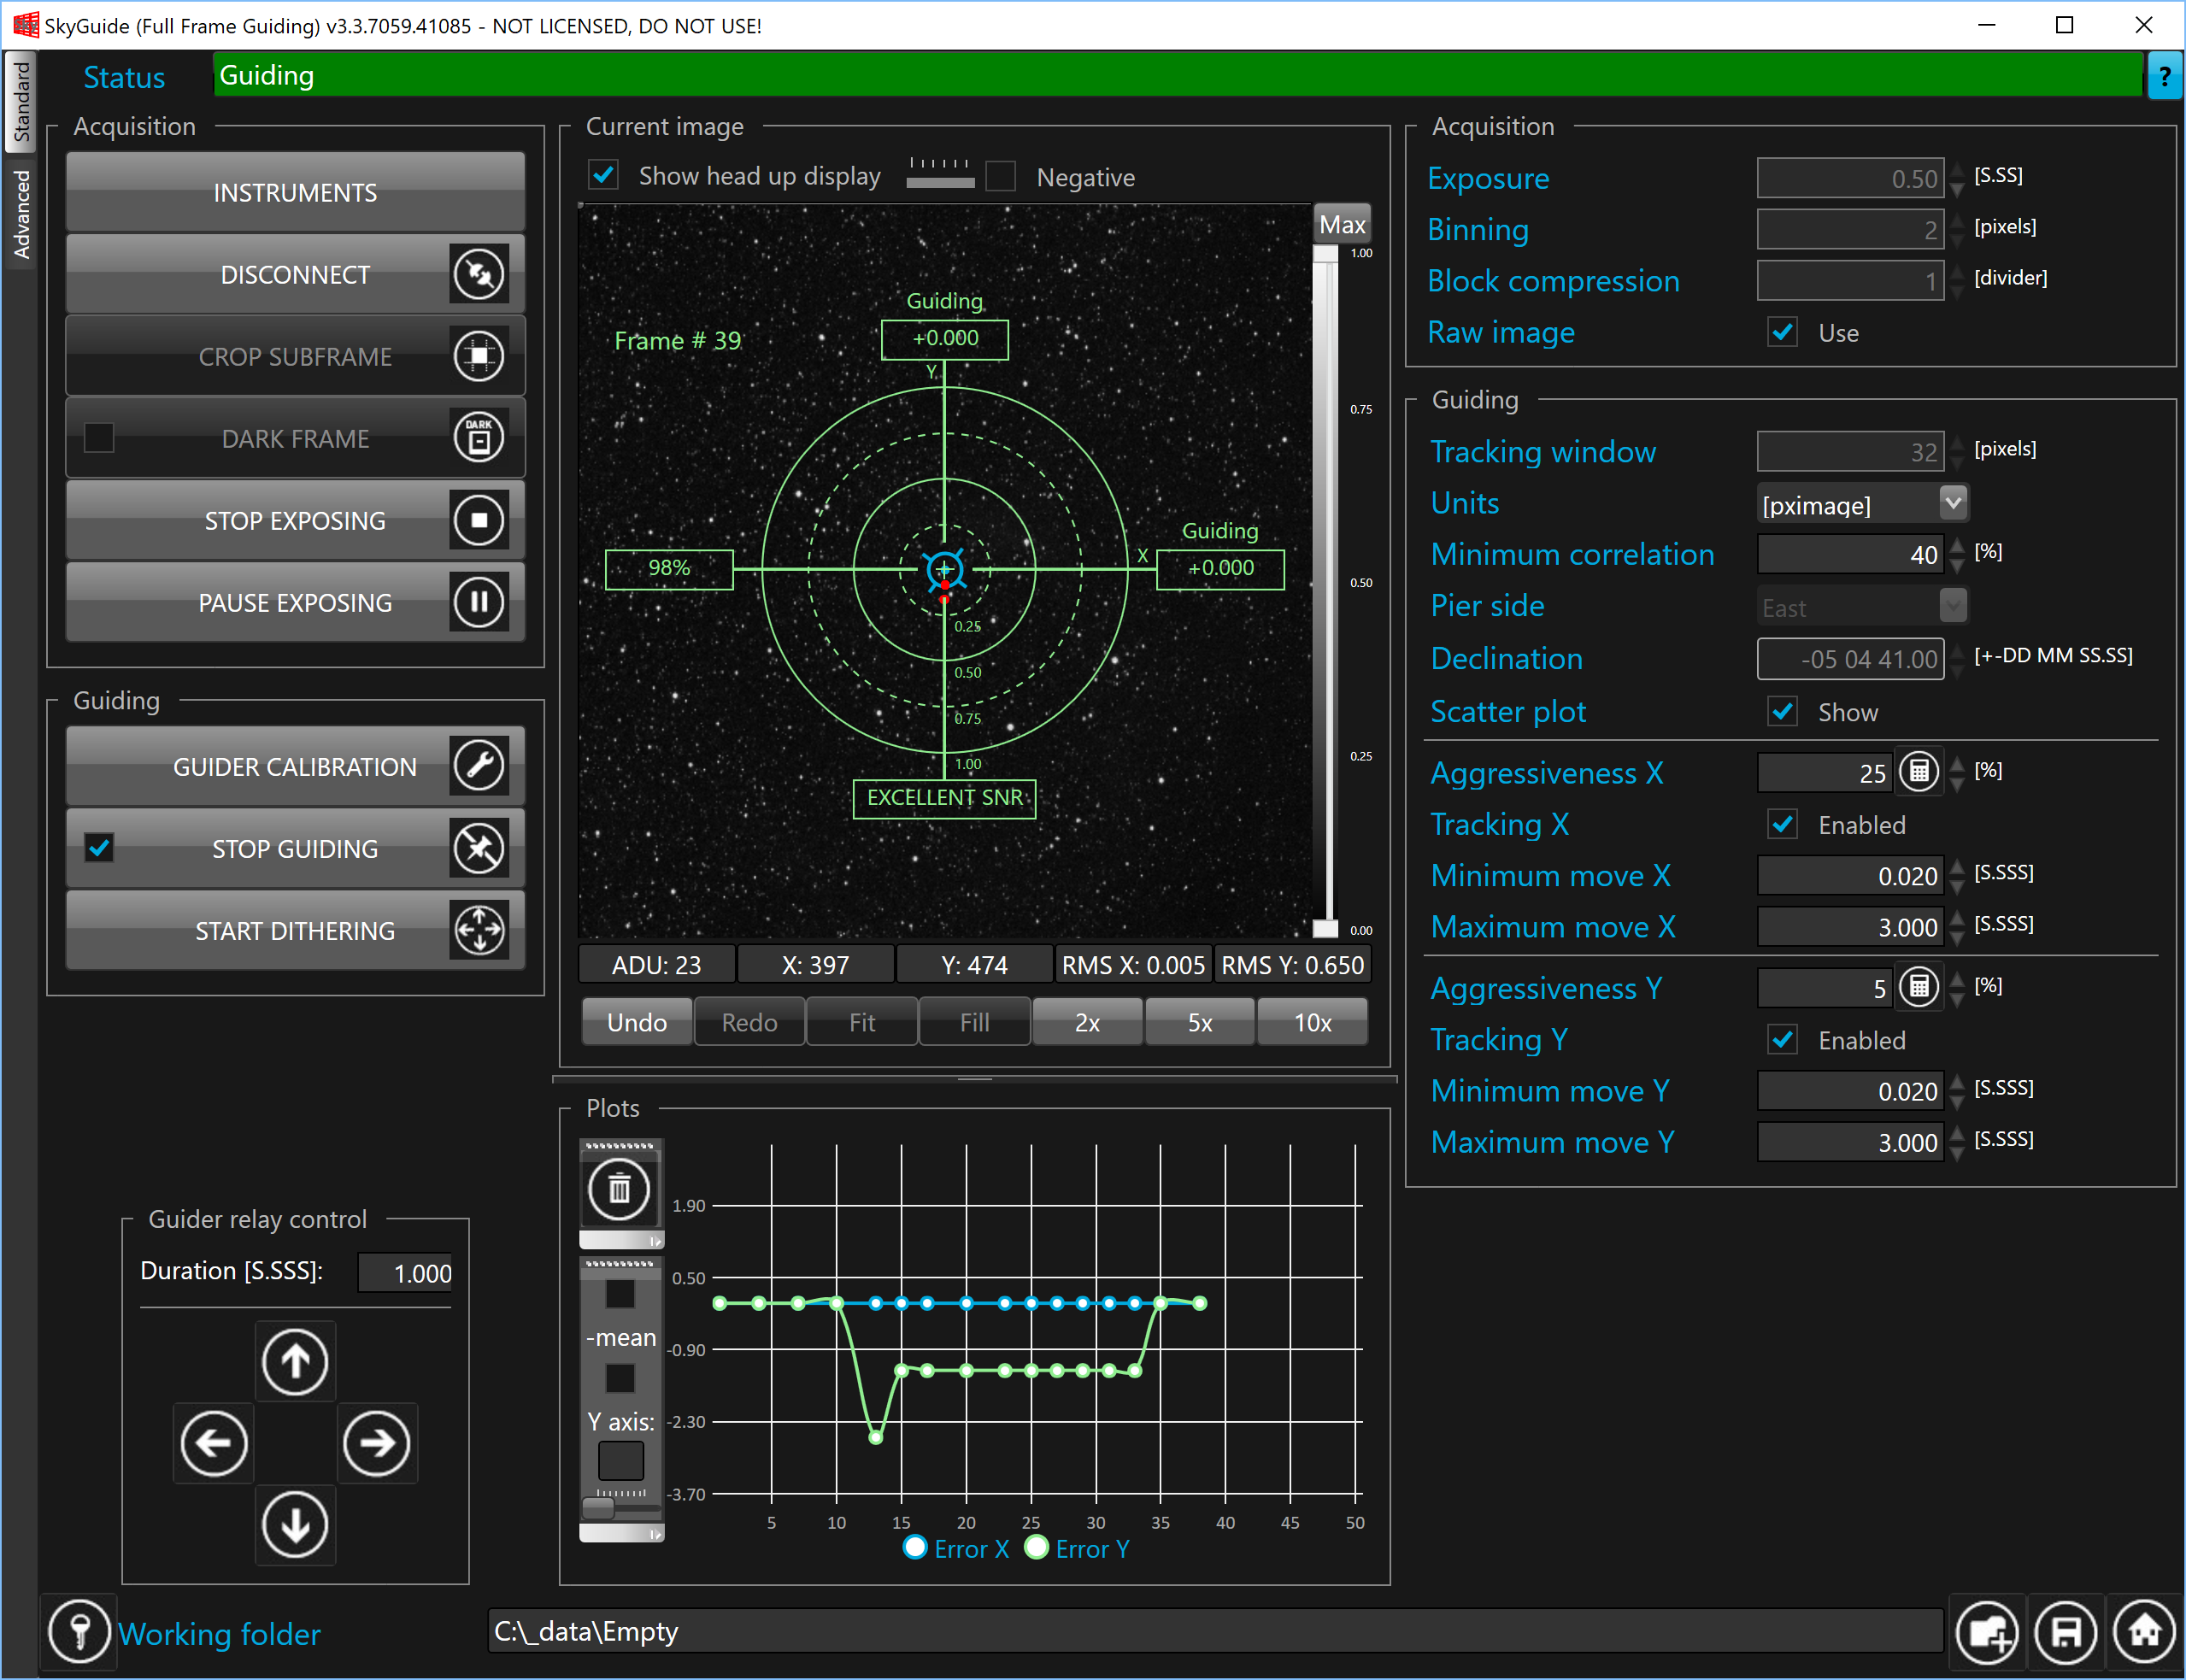
The standard user interface is organized in a way that all relevant information about guiding are displayed as an overlay of the guider frame. The aim of this interface, is to offer an intuitive and easy to use interface that allows the user to control auto guiding in an easy way.
1. The status of the guiding is displayed on the top row, the following statuses are available:
Status |
Description |
Idle |
Guider camera is not connected, not exposing or guiding loop is not running |
Calibrating |
Guider calibration process is running |
Guiding |
Guiding loop is running and correcting the mount tracking errors |
Paused |
Guiding loop is paused |
Looping |
Guiding loop is running but no corrections are sent to the mount |
Failed |
Failure has occurred in guiding loop (check SkyGuide.log to get more information about the failure) |
2. On the left column, there are all acquisition, guiding and guider command buttons
3. In the current image (middle-top), the current guider frame is displayed with all relevant information shown as head up display.
4. On the middle-bottom, there is the guiding plots with two curves: one for the X axis and one for the Y axis.
5. On the right column, there are all acquisition and guiding settings (such as exposure time, guider aggressiveness, ...)
6. On the bottom row, there are the working folder location and the command buttons that allows to manage the workspace.
Click on the ![]() button to configure your instruments.
button to configure your instruments.