Advanced

The advanced user interface (GUI) provide much more information than the standard user interface. The advanced GUI is for more experienced users while standard GUI is a simple and intuitive interface for using SkySurveyor.
We recommend new user to start with the standard GUI first.
 Nevertheless, both interfaces are synchronized, you can switch between the standard and advanced user interface with the vertical tabs at the upper left corner at any time, It may take one guider frame to refresh the GUI data.
The advanced user interface is subdivided in five distinct areas:
1. At the upper left, the guider frame acquisition loop controls
2. At the upper right, the guiding loop controls
![]() 3. At the middle right, the focusing loop controls
3. At the middle right, the focusing loop controls
4. At the middle left, the view ports (at left the guiding view ports at right the ![]() focusing and the camera output view ports).
focusing and the camera output view ports).
5. At the bottom the plots and the log
Correlation view ports

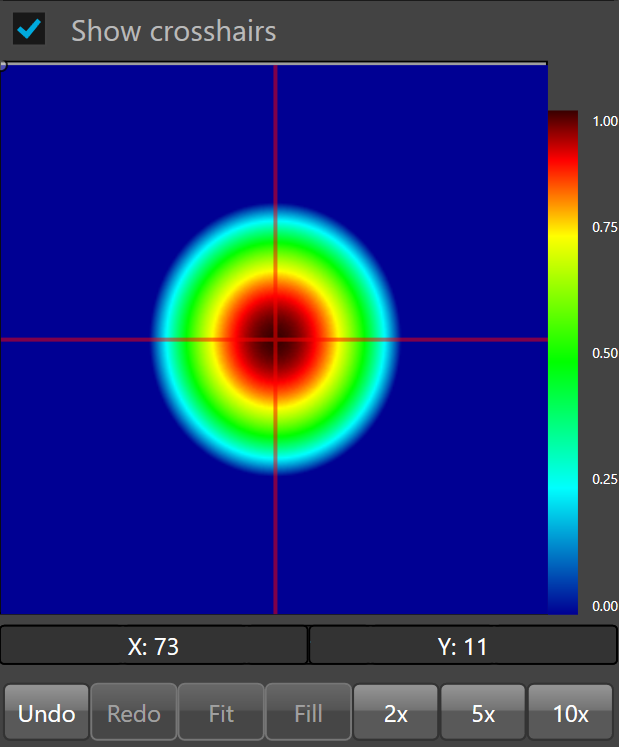
At left the guiding correlation view port displays the correlation of the guider frame versus reference frame. The correlation frame looks like a bell shape showing the correlation peak which is color codded, black at the relative maximum correlation (maybe below 100%) and blue at the minimum.
When there is no tracking error the correlation peak is perfectly centered at the middle of the view port and with the red cross hairs when enabled.
![]() At right the focusing correlation view port displays the correlation of the focuser. The correlation frame looks like an ellipse that is almost circular when the scope is at focus and horizontally or vertically elongated when then the scope is out of focus.
At right the focusing correlation view port displays the correlation of the focuser. The correlation frame looks like an ellipse that is almost circular when the scope is at focus and horizontally or vertically elongated when then the scope is out of focus.
Show crosshairs shows/hides the red crosshairs locating the zero guiding error point.
The mouse position on both axes X and Y are displayed below the view ports.
To zoom in/out just move the mouse wheel or use the Fill, 2x, 5x or 10x command buttons.
To pan the zoom image, just left click, hold the left button down and move the mouse to the direction you want to pan.
To fit the image inside the view port, click the Fit button.
To restore the previous zoom, click the Undo button.
To restore the next zoom, click the Redo button.
Image view port
The image view port shows the guider frame processed by the pre-processing algorithm (with proper noise cancellation and image enhancement)

The image view ports always displays the pre-processed guider frame.
To display the ADU of a selected pixel in the image, just left click the image on the selected pixel.
To stretch the image, just click on the left button to the low/high slider, hold the left button down and move it to the desired level
To restore the stretch to the maximum levels, just click the "Max" button
Camera output view port
The camera output view port shows the raw guider frame in a gray scale
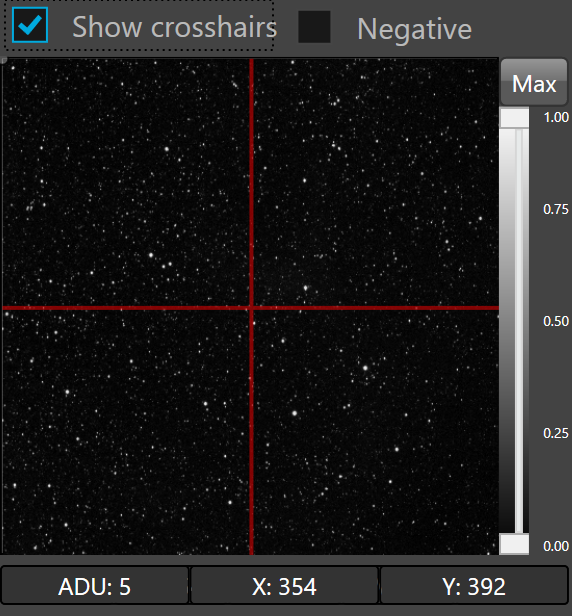
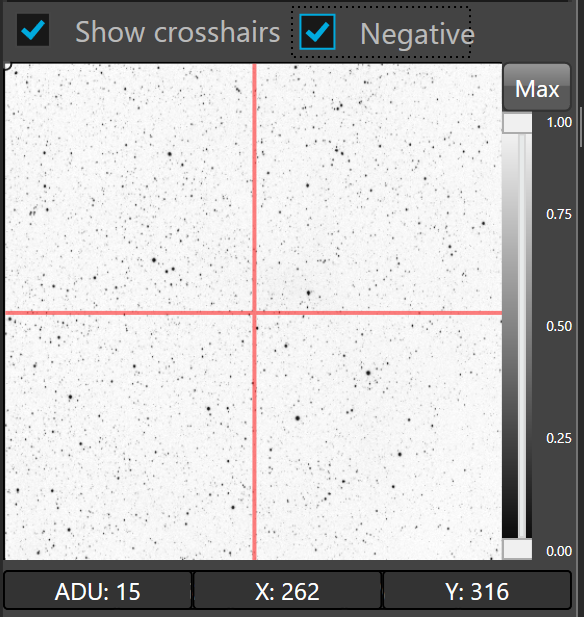
The camera output view port always displays the raw guider frame excepted for cropping. While cropping, the displayed frame is relative to the state of the raw frame check box in guider exposure tab.
The negative check box reverses the image (signal is black and background is white)